
Fantasy Environment - Base Meshes and Greyboxing
As you can probably tell, the site has had a bit of an update recently, and we’ve had some busy and unfortunate news this month to do with family. This has taken a bit of time away from my project but let’s do a breakdown to see how I’m travelling anyway.
Timeline progress:
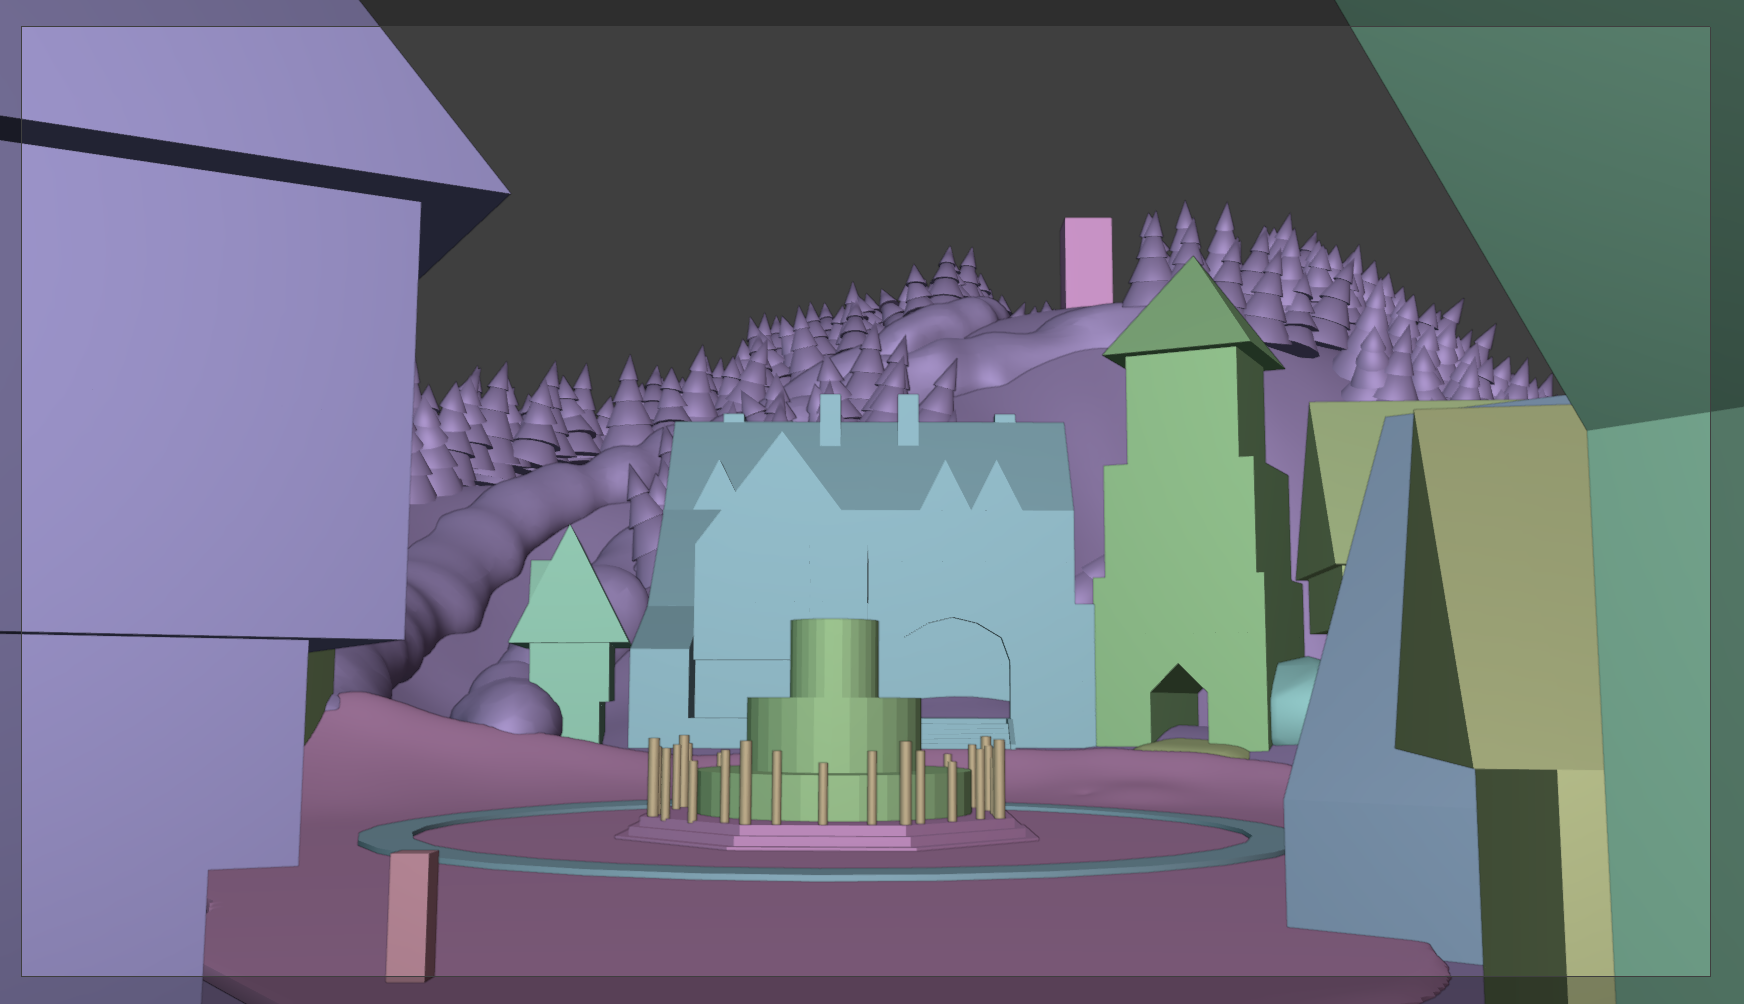
After a day and a half, I had completed the initial greyboxing layout sorted out. I worked out where I wanted the eye to wander, and then put some lights in. The camera view is still a little up in the air though, so refinement is required.
I put some very basic lights in, but the tower’s lights are currently too bright. They draw the attention away from the statue and the fountain. So I’ll note that down for later.
So 1.5 days greybox - done. YAY!
But I had to make a tool to create some trees. I knew that I needed to make something that I could swap out inside of Unreal but also inside of the tool. So in Blender I created a geonodes tree generator for very basic use.

Scene composition: 1.5 days (Greyboxing)


Make Trees
Initially I hit a hiccup with the tree. I couldn’t understand how to call attributes using different meshes. Eventually I had to use the Named Attribute Node and call a custom name that is very manually vertex painted on to the mesh. This string is hidden in the input node so that I can’t touch it later on. I know it can be created better, I just don’t have the time to invest into creating a huge tool. Especially when I can pay for tools online and save myself all that time.
The geo-nodes tool takes from the L0 (Level 0), L1, L2 and Top collections to create the spine of the tree. These have random scales of 0.8 to 1.2 to get a variation.
Then the branches from the Branches collection are used on the stem connection vertex paint. I can control what parts of the trees I absolutely do not want any branches growing out of - very handy
Tree Tool: + 1.5 days (Greyboxing)
The entire node tree can be seen here.
Old Meshes, meet New Meshes
Environment Prop Modelling: 2 days
So we have the following meshes that have been UV unwrapped (although some meshes, like the bread will need to be remade into a viable game mesh), and ready for high-res sculpting
Town Wall
Town Gate
Sewer grate
Basement Doors (a high base mesh and a solid, low basemesh to bake to)
2x street lamps
Brazier
3x Barrels (Open Empty, Closed & Full)
Fork
Knife
Spoon
Wooden Spoon
2x Bread
1 Bread Bun
4x Dried/Smoked Fish
2x Fruit (with stem and without)
2x Flower boxes (ground level)
Vase
5 Large Jars with and without labels
4x Flower pots
8x bottles
Hanging Flower Box
2x Tables
Table Cloth
3x Wooden Logs
1 log broken into 8 sections
7x rocks (that can me made, pebbles, small, medium and large~ish)
Bucket - intact
Candle holder empty
3x base candles
Candle in candle holder
2x plates
2x bowls
broken plate
2x broken bottles
2x cups and
a Stein.
*Bold means it was made already.


And while that does seem like a lot, I still have a lot more items left to create
Picnic Table
Wood Gate
Steel Fence
Steel Gate
Stone Stairs
Wood Fence
Latticed Fence
Axe
Stools
Shop Signs (at least 2)
Daisies
Ferns
Grass Tufts and Grass Cards
Oak Trees
Dead Trees
Ivy that can climb
2x Bushes
and a standard Veggie patch (if time permits)
Fachwerkhaus designs:
Fachwerkhaus: +3.5 days (prop modelling)
I have found a fantastic image on Wikimedia of Miltenberg’s Marketplace area. The way the houses look almost organic is amazing. And this gave me some inspiration and ideas on how to create things.

Fachwerk buildings of Miltenberg in Germany Marketplace (Marktplatz). Original image found here: https://upload.wikimedia.org/wikipedia/commons/f/ff/Viel_Fachwerk_am_historische_Marktplatz_in_Miltenberg.jpg
Unfortunately, I’ve been concentrating on the Fachwerkhaus designs so much I’ve put the rest to the wayside for now, it has gotten to the point where I’m frustrated with the project. I may have to go back to the props for something uplifting.
I wanted to try something new to me, where I create the sides of the houses and then sculpt the details to the walls. This could set something up for procedural modelling - but I don’t really have the time to work that out. I only require 14 individual buildings, not an entire cityscape. And for the most part, these will be very different to each other. So a prebuilt wall seemed like a healthy alternative.
Whole, 2/3rd and half blocks were used to create these buildings. I tried to stick to a standard size.

I add to the greybox level though and updated the layout in both Blender and UE with semi permanent structures. They don’t look like much, but they have just enough detail to replace V1 and then get replaced by V3 by reimporting that specific house from a different fbx file.
I am still working out if I’m using groups inside of UE or if I should be making blueprints for all of the buildings
Argument against: they won’t be interacted with so grouped in the scene
Argument for: I can animate the lights if I’d like, seeing as this won’t just be a single image anymore.
More research is required.
Importing buildings V2: + .5 day (Greyboxing)

Verdict
Prediction
Greybox in Engine - 7 days
Model and Sculpt props - 10 days
Reality
Greybox in Engine - 4 days (on and off)
Model and Sculpt props - 5 days - so far
Honestly, because my past few weeks have been really broken, I was more disappointed in my progression before I made this post. And I’ve realised that I actually seem to be on track. However, I’m now starting to think that 10 days to do both low and high res models is not enough time.